If you work with threads and yarns, like me, you know the difficulties sometimes to choose colours… It;s not that I can;t match and mix, that’s not it…. it;s the possibilities…. oh boy…..
So to get some feedback, I asked my followers form IG click HERE to follow….. to pick between green and red shades.
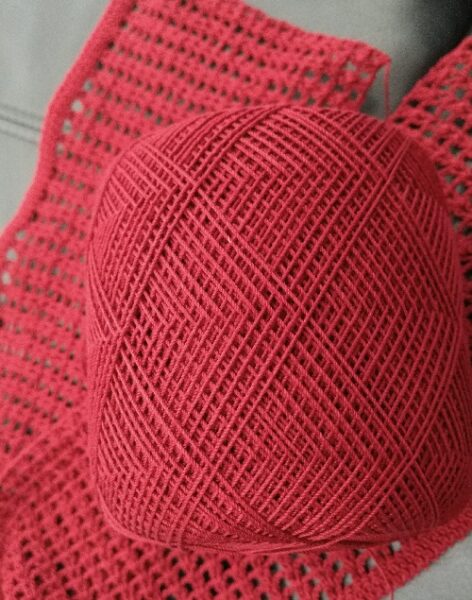
And the crowd has spoken! And RED it is….. To the simple crochet pattern I will add Romanian Point Lace designs, of course in traditional Romanian Point Lace designs, floral and organic elements. These elements will be in Bordeaux and Red…. later on for the top should part will be a lighter colour. The lighter colour is still not picked but it will probably be a pink shade…. something lighter to brighten up the neckline.
The Romanian Point Lace will be a mix of colours and cords. as well as an organic pattern.
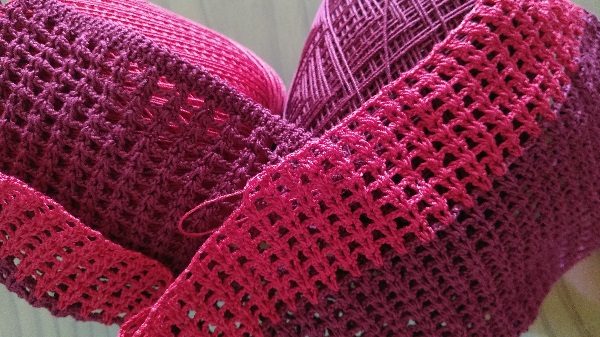
As I started the project I wanted to start with a different Romanian Point Lace cord. It is wider and flatter with the Bordeaux. Check it out in the picture below!
It takes a while to get used to it, since it;s different from all the other cords but it;s fun and great for Crochet clothing giving it a clean edge and fine result. It;s neat and holds it;s shape great.
As you can see, the cord has a wave pattern in it. and once achieving the right length, you can start with the crochet part of the design. It is easy to create a design by using the edges of the cord….
The first block of colour in this case Bordeaux, counting 20 rows of crochet a second colour block will follow in Red, Since this project is still wip….. I can;t tell you how many rows of red will be made. So far it;s around 25…..
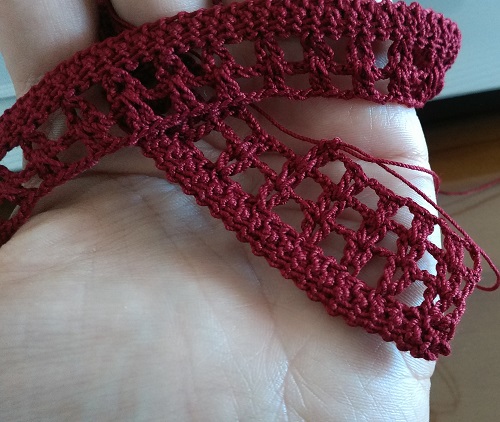
Now for the Romanian Point Lace part, I started in Bordeaux see below…..
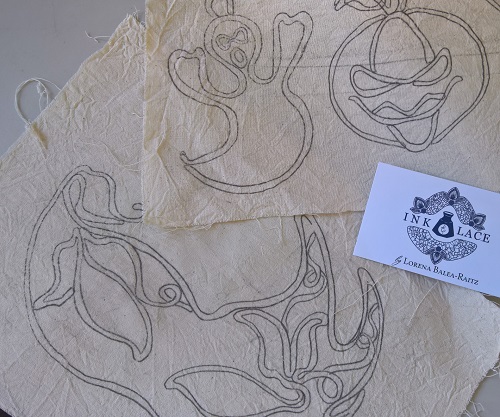
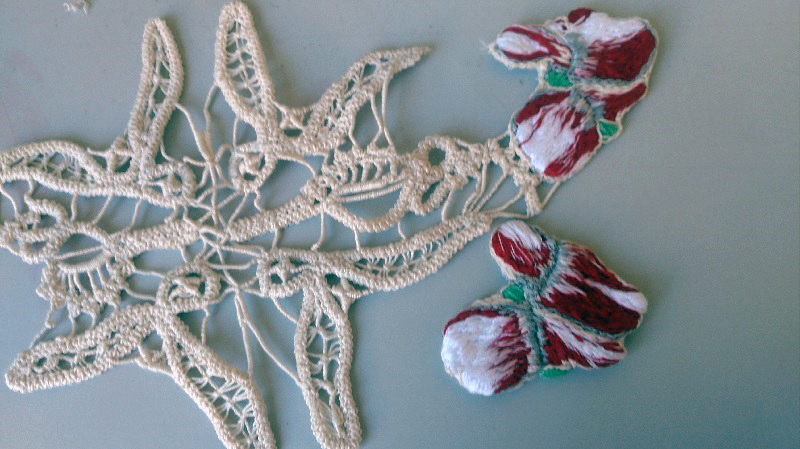
It;s always an interesting process, meditative to me and relaxing to sew the cord to the calico and thinking about the fillings. Some of the fillings you can see in the image below. Remember, do not so more thn 3 designs in one element!
This will probably be my last post for this year and so first of all, Merry Christmas and a Happy New Year!
Now since Christmas is soon over most people , including me, think about New Year’s Resolutions! Oh i know, it’s mostly a mess! It always starts nice and ends up in a mess by March! Oh well this might help you out! Click HERE and grab your freebie!
Thank you all for being with me and for taking an interest in RPL , art and Prints and everything that is surrounding INK & LACE!
Love, XO,
Lorena
PS: Head over to my YouTube, I uploaded a video, on how to actually make a pattern for your RPL design! Click HERE and watch!
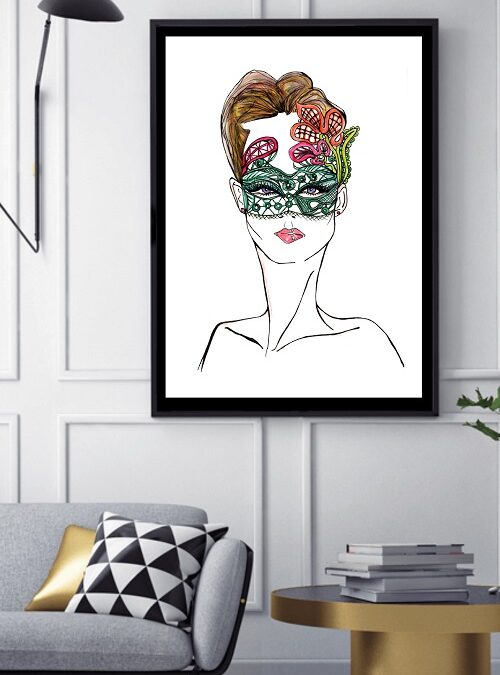
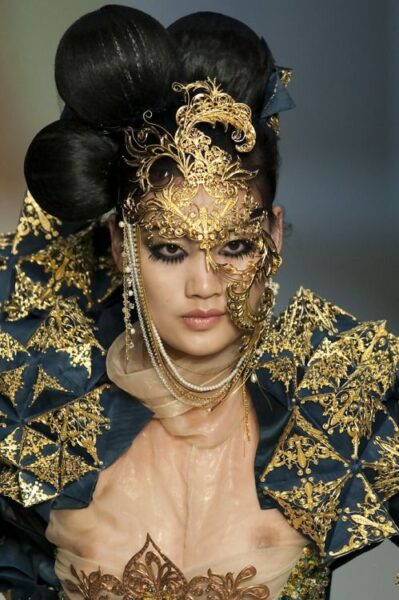
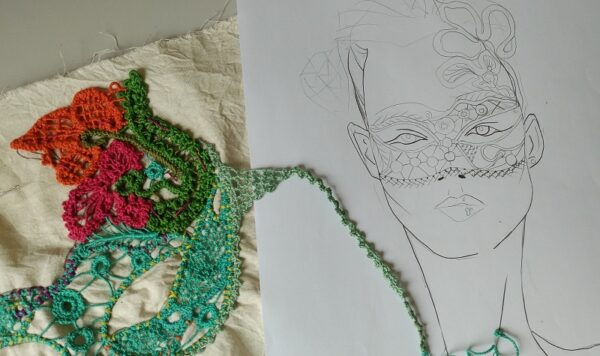
I actually like masks, I have to say I can’t wear them coz I am wearing glasses and absolutely failing on putting contacts on. With this said, I can show you how I made a mask of course in RPL for the first time! Now the image above is not your usual mask, but I think you know by now, that I never pick your usual designs! Image -Guo Pei Haute Couture Gilded Mask.
The Idea…..
I was asking in a really gorgeous FB group what else I could create in RPL , next to my jewellery and pattern. Now one lady suggested, that I create lace masks, and so I did a lot of research and gave it a long thought. If you would like to check out her amazing Etsy store, check it out HERE. She does gorgeous items! Thank you Karen, you made me think about mask lace idea! I had many questions, that I needed to answer, before even embarking such project. A large project because, masks are different. You put it around your face, so it has to mould easy and stay ok….
So I checked Pinterest. Here you can visit our our boards!
And the cords is on!
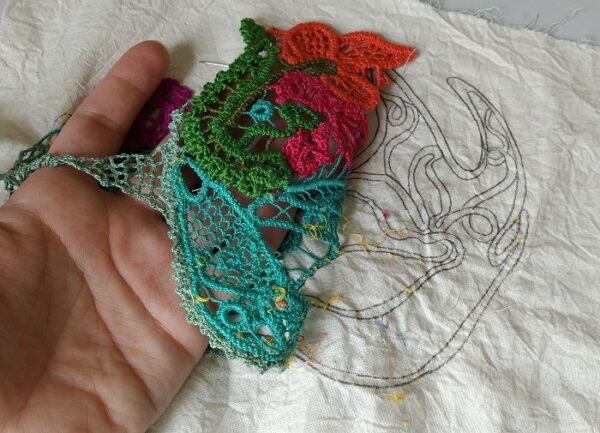
Above, you can see the beginning of the mask idea…. Raw, easy and still a virgin….. LOL! I had no particular fillings in mind, no ideas, where it will take me and if it would be larger or smaller. Quickly after the base idea was shaped in my mind, colours and netting were picked. I ended up adding tulips to it.
It was important to me to combine, greens and vibrant colours to make it all come together. And like I said, I wanted to say away from black and classic red or white. Anyways, this is where it went…
A mask is an ancient form of a facial disguise, it was used to frighten enemies and contain identity. In modern day the mask is generally known to be a symbol of the concealment of the ego behind an artificial mask. In ancient Greece the mask was very common, and used for actors on stage. But do you know, where that mask comes from? Actually mask exist from 7000BC and were used in theatre ( Greece) but they became very popular in ancient China and in the 13th century they very introduced in Italy, specific in Venice…. The rest is history and the mask dominated and fascinated Europe since then… The Carnival was born and the Masquerade…. was a new idea… But back to this project…
The Sketch….
Before starting the lace on calico and having enough cord, I always sketch and draw the idea of the mask. This sketch was the start and birth of the mask. Even though I sketch the mask with an adult woman in mind, I wanted the mask to be wearable for my little girl in mind.. I wanted to make it fun and here came the idea of adding flowers and so to add colour – in this case vibrant emerald. She is born in May so emerald is her gemstone. It was falling into place just fine.
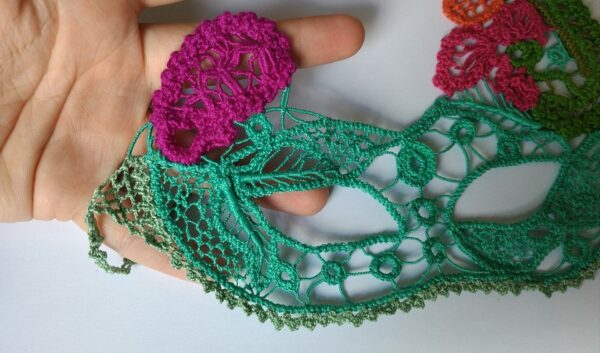
I also introduce into the mask, the traditional crochet rings, as seen above. I loved the idea of recreating a web like design….. I will elaborate the sketch into a watercolour print as soon as possible….
The designs in the mask are a mix of netting and fillings. I am also using different type of cords like you see in the image above. A simple cord in the dark / emerald green and a fan cord in the lighter green.
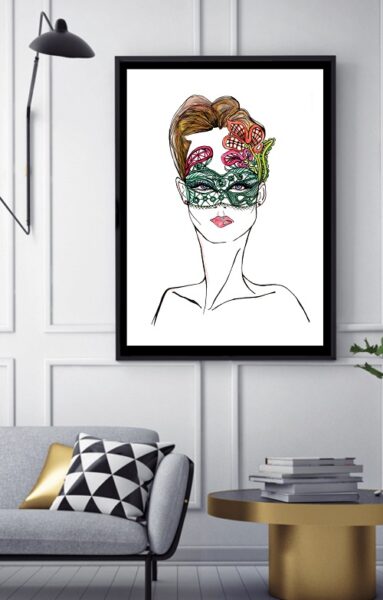
The Illustration…
So, now let me show you how it looks on her…. coz voila it;s ready! And If you are interested in having a mask done in this style or similar, get in touch! Also if you like the illustrations, you can check out the Etsy Store HERE. I am very exited about this piece, not only because it;s the first time I made, it, but also because it made my little one so happy and she felt exited about wearing something so different!
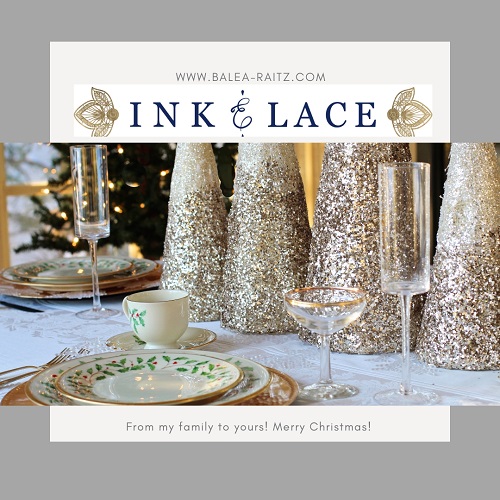
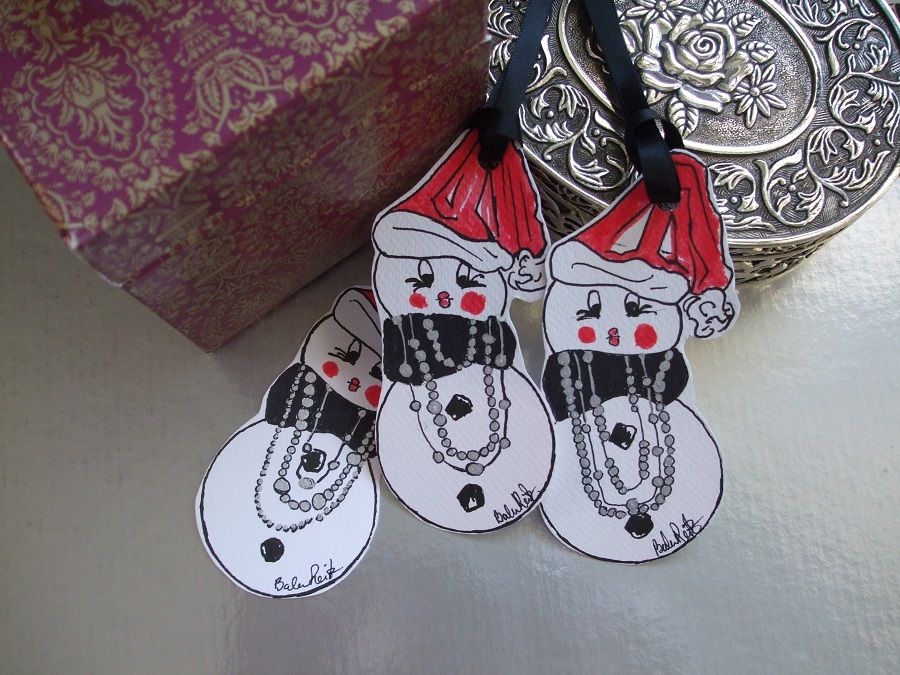
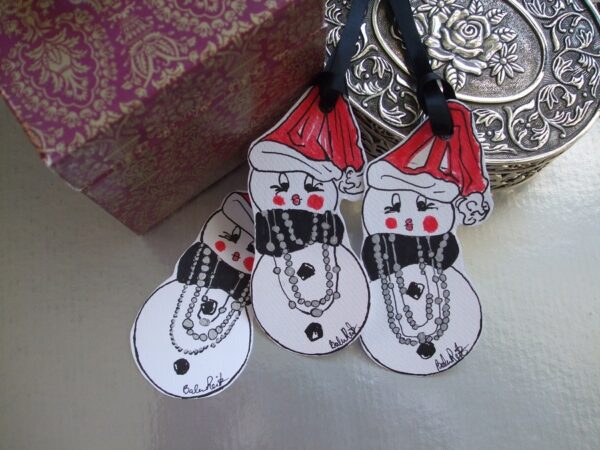
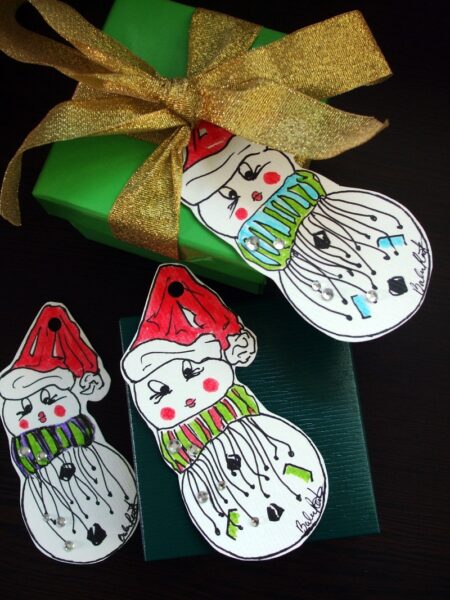
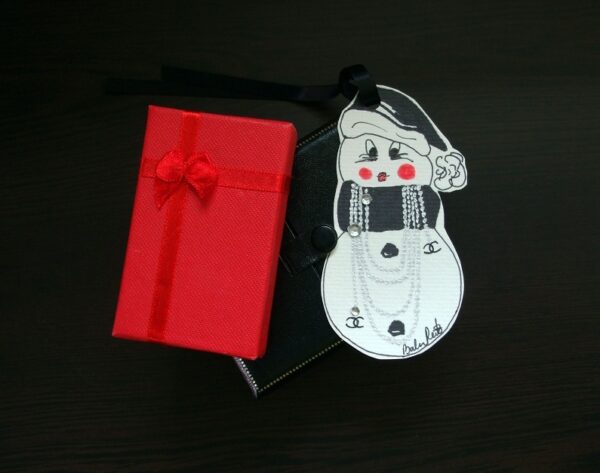
When I was creating these cute little gift tags, this song was playing in the background.
Deck the halls with boughs of holly
Fa-la-la-la-la, la-la-la-la
‘Tis the season to be jolly
Fa-la-la-la-la, la-la-la-la
Don we now our gay apparel
Fa-la-la, la-la-la, la-la-la
Troll the ancient Yule-tide carol
Fa-la-la-la-la, la-la-la-la ( from the song Deck the Halls)
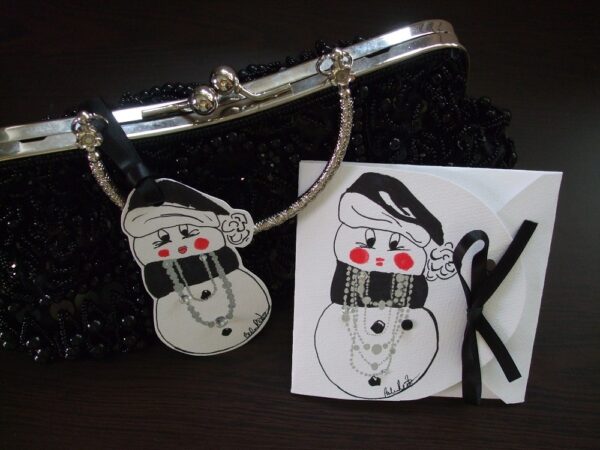
Now I am not known for using a lot of Rhinestones, or even any… but in this case I make an exception! I love these cute Coco Chanel Inspired Gift tags. I was always wondering as s child why is it always a Snowman and not a Snow-Woman?! No copyright infringement intended – I simply love Chanel and always wondered how a Chanel Snow Woman would look like!
So I created a few sets in classic black and white and a few colourful sets ready for Christmas. They are handmade, fabulous on high quality watercolour paper and are perfect to style every gift. Check them out HERE!
Don;t wait till Christmas, these goodies might be gone!
Romanian Point Lace and Embroidery is a marriage made in heaven. I started to work on one traditional doily of course in RPL style with a twist, I am using modern influences and embroidery.
Here are a few tips for you if you are interested to start a Romanian Point Lace doily. First of all, GRAB YOUR FREEBIE! and check this list, that is great for RPL, Crochet and Knitting…..
FIRST TIP! Make sure that you have enough cord ready! It speeds up work work and it does not cut and interrupt the joy of creating the fillings! If you are in the mood to create the fillings, and are finally exited that the designs go your way, you do not want to leave it aside and create cord. It is also harder, if you have to connect new cord to the old cord while working on it!
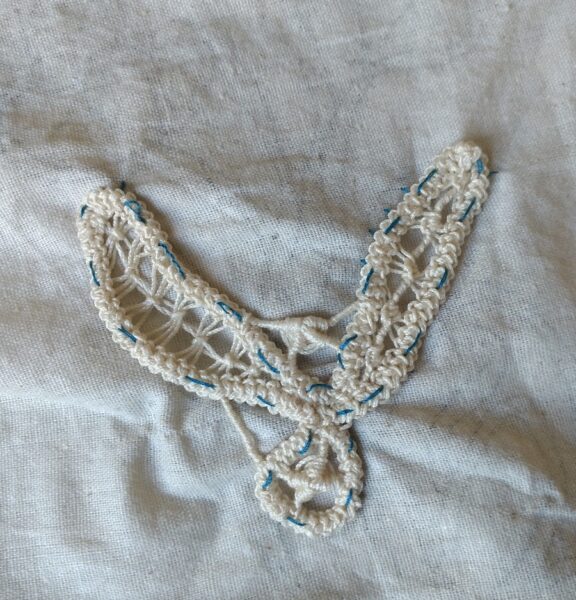
SECOND TIP! If you feel overwhelmed that almost all Romanian Point Lace doilies are medium to large you can break it down into small pieces! This image below is one small part of the doily that is work in progress. Since traditional Romanian Point Lace is about repetitive designs, I find it easier for beginners, to create small repetitive parts of the same design.
In this design you find three fillings elements that are in the basic booklet here.
Now I would advice you to create these repetitive parts first and leave them aside. First of all, it’s good because you will learn and practice these fillings.
In Romania where women do Point Lace all their lives, they actually know all traditional designs by heart…. Oh boy imagine that!
Anyways let’s move on… to the next TIP!
THIRD TIP! You can do the same with the embroidery part of your doily. In my case I create all the Rosebuds in one go! Yes, in one go! It;s great because that way you get the embroidery ready and can leave it aside!
My LAST TIP is to make sure that you have enough thread to create a doily! Do not mix and match the basic cord colour! It will not look very great once that doily is put together.
If you already create Romanian Point Lace and do not find it very hard, of course you can create it the traditional way by create the pattern in one go!
Once you have all the pieces of the Point Lace created, you can put it together like a puzzle!
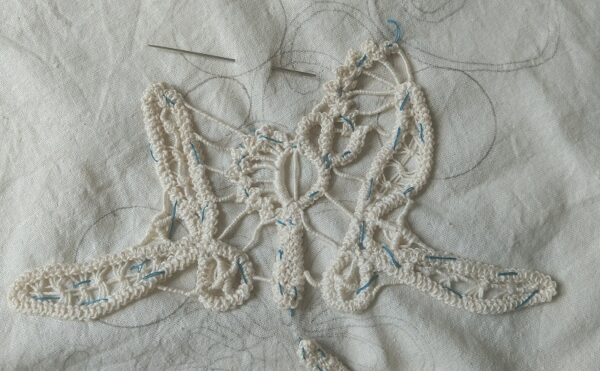
You see the two identical designs, are having in the centre one more design! Now this is half of the doily already…. All you need to do now, create the other part and voila your Romanian Point Lace doily is finally taking shape!
There is one advantage in working this way! You can actually create a different pattern once you all doily parts ready! You are not able to do that if you work traditionally.
This is what I love about doing Romanian Point Lace in parts. I have the opportunity to change my mind, if I discover a ‘better’ design!
I would encourage you to find your way. Create Point Lace how it;s best for you. If you have another way, please let me know!
I can;’t say, that this is a TIP as well, but I work like this. When I work on a project, I keep it all together in one spot. Meaning all the items that will make this pattern, designs work I find in one box, bag, or container.
I keep the threads for both embroidery and Romanian Point Lace in one container as well as the needles, scissor, sewing threads and cords.
Now you can resize your pattern once all the pieces are ready. This is the tricky part if you work in pieces to create a Romanian Point Lace doily. I sew ruffly the pieces in shape and create simple bars or other connecting elements in between. Once this done, I sew the embroidery Rosebuds. Here again you can move them around till you find that right place for all your Rosebuds. The picture above is just an example. I am not done with this doily and once I finish the project I will have the pattern available on Etsy and here on the website.
I am thinking to create a section strictly for pattern that will be available. Simple designs in small, medium and large. It will include embroidery as well. If the interest is there, I will even include custom order designs…..
XO,
Lorena
PS: Stay tuned to the next post and see the doily ready!
Sign Up Now and you will receive 15% OFF your first order PLUS grab 4 FREEBIE including My morning routine Reiki principles, Palm Chakras Activation, Thread_Yarn Cheat Sheet and a print and art journal mood trackers.
Thank you for subscribing. Please use the discount code SIGNUP15 on checkout. An email is also on the way with your FREEBIES.

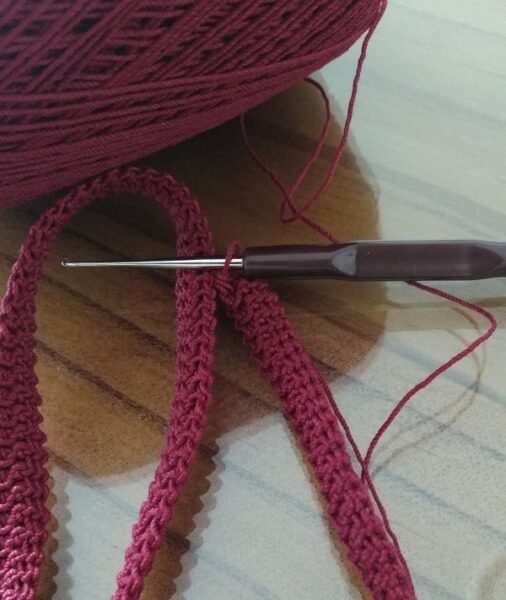 As you can see, the cord has a wave pattern in it. and once achieving the right length, you can start with the crochet part of the design. It is easy to create a design by using the edges of the cord….
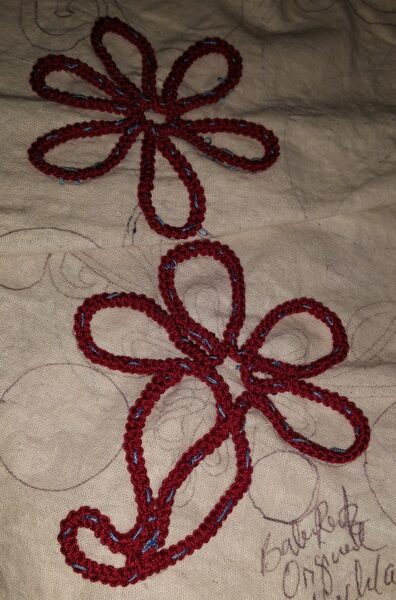 It;s always an interesting process, meditative to me and relaxing to sew the cord to the calico and thinking about the fillings. Some of the fillings you can see in the image below. Remember, do not so more thn 3 designs in one element!
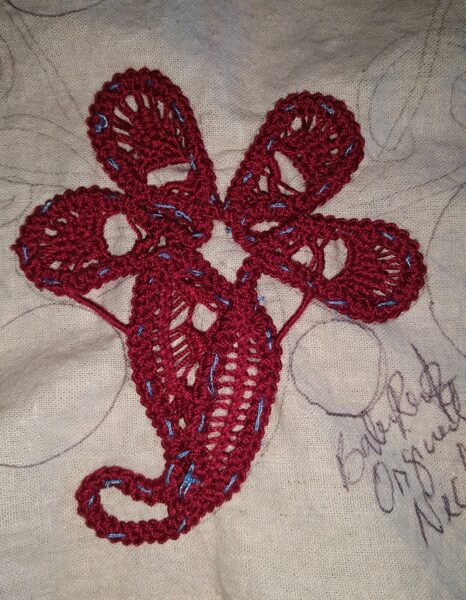 crochet clothing. So stay tuned to more updates!