If you work with threads and yarns, like me, you know the difficulties sometimes to choose colours… It;s not that I can;t match and mix, that’s not it…. it;s the possibilities…. oh boy…..
So to get some feedback, I asked my followers form IG click HERE to follow….. to pick between green and red shades.
And the crowd has spoken! And RED it is….. To the simple crochet pattern I will add Romanian Point Lace designs, of course in traditional Romanian Point Lace designs, floral and organic elements. These elements will be in Bordeaux and Red…. later on for the top should part will be a lighter colour. The lighter colour is still not picked but it will probably be a pink shade…. something lighter to brighten up the neckline.
The Romanian Point Lace will be a mix of colours and cords. as well as an organic pattern.
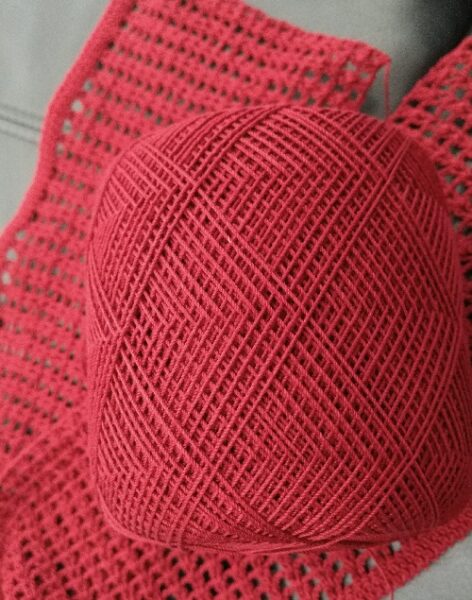
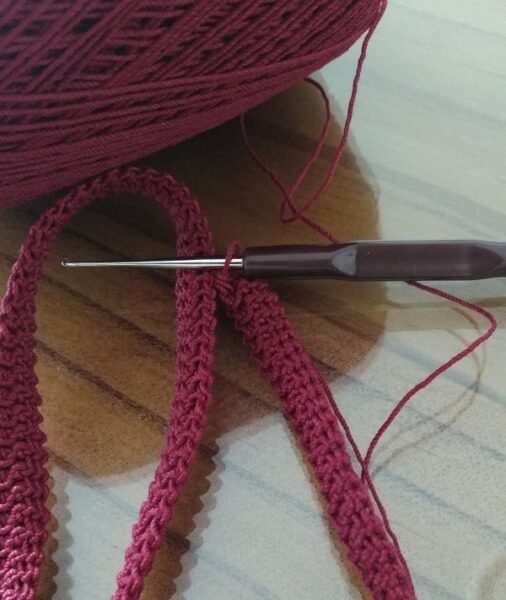
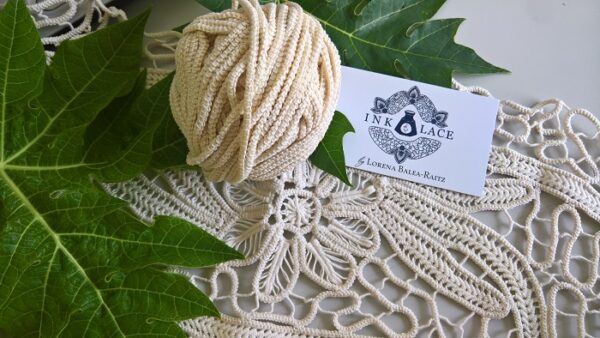
As I started the project I wanted to start with a different Romanian Point Lace cord. It is wider and flatter with the Bordeaux. Check it out in the picture below!
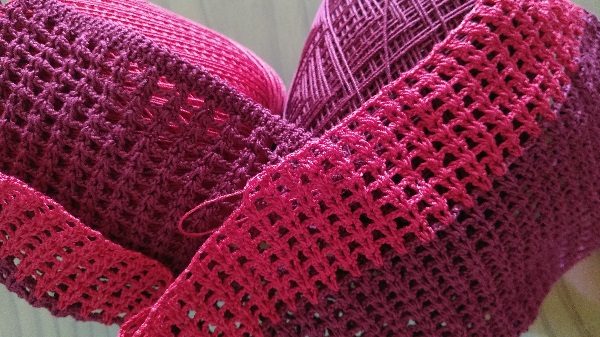
It takes a while to get used to it, since it;s different from all the other cords but it;s fun and great for Crochet clothing giving it a clean edge and fine result. It;s neat and holds it;s shape great.
As you can see, the cord has a wave pattern in it. and once achieving the right length, you can start with the crochet part of the design. It is easy to create a design by using the edges of the cord….
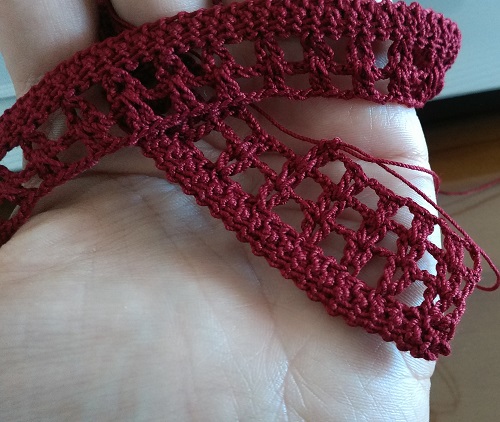
The first block of colour in this case Bordeaux, counting 20 rows of crochet a second colour block will follow in Red, Since this project is still wip….. I can;t tell you how many rows of red will be made. So far it;s around 25…..
Now for the Romanian Point Lace part, I started in Bordeaux see below…..
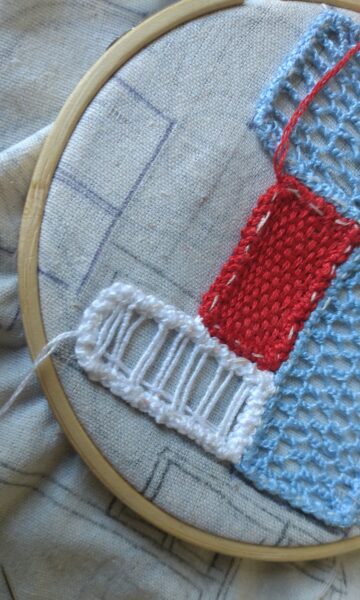
It;s always an interesting process, meditative to me and relaxing to sew the cord to the calico and thinking about the fillings. Some of the fillings you can see in the image below. Remember, do not so more thn 3 designs in one element!
I hope to find you well and welcome to this page and blog! In my last newsletter I was writing about how it is important to share your story… It is important to make sure we hear other stories so that we can learn, create and thrive…. With this in mind, I was writing to my subscribers and asked them to share their own Romanian Point Lace Story…. How they started… What makes them fall in love with such antique lace making method….Etc….
And here I would like to share an a story from Marg. She is a lovely lady who came to my classes and Brisbane and fall in love with RPL and it;s threads.
Read and get inspired!
My Romanian Point Lace story. I’ve always loved making lace – started crocheting when I was a teenager and progressed to tatting not that much later. When I was about 30 I “found” bobbin lace, and started making torchon lace in earnest – as I always taught myself the various types of lace I’d done. I worked in a hospital, and one day a patient gave me a piece of lace that I didn’t recognize. For about 15 years I’d look at it in amazement, and then one day I saw lace that Lorena was making, and realised then that the gift was a Romanian Point Lace doily. I just had to learn how to do it, and now I’ve been making RPL (on and off) for nearly 4 years. I don’t have a favourite stitch; I love the traditional form of it best, but the things Lorena makes are amazing and truly inspirational. I can’t remember the name of the lady who gave me the doily, but I still have it and treasure it, and I’m sure she would be happy that she inspired another person to start making RPL.
Now let me tell you that Marg’s story reminds me of something that happen to me in Brisbane. As I was teaching lace as usual a lady named Lorraine contacted me….. to meet her mother who is way beyond 90 years. I am not sure what it;s all about and as I was asking further she said that her mother made RPL when she was younger and would like to meet me. I was surprised and amazed how far a little lace can take me. It truly made my day and reassured me that it;s the right path to teach this fantastic craft.
Thank you Marg for sharing your story with us!
Looking forward to see more pieces made by you and others that I teach!
XO,
Lorena
PS: If you want to receive my newsletter and find out more about RPL, Art and so much more… sign up HERE!
Like you know I am always working on many projects at the same time like that Mondrian brooch, the Rosebud modern Romanian Point Lace doily, the lace mask, and the Rosa Canina with abstract vein elements, etc….
So let’s just talk lace for a minute….. Is your coffee hot? Mine is…. like you know I am a coffee addict!
Every time I create a piece of point lace, does not matter, if it home decor or a jewellery , an accessory, etc…. I want to tell you the best way to keep it clean, dust free, and long lasting.
Are you ready? Sure you are!
First of all each project needs it;s own place, while you work on it. I keep mine it little containers if I am at desk. If it;s on the go in a zip bag is best.
I don’t buy boxes unless it needs to be organised in the lace closets. Yes, I do have lace closets where everything is organised by colours, or projects or topics, art, books, threads, etc…..
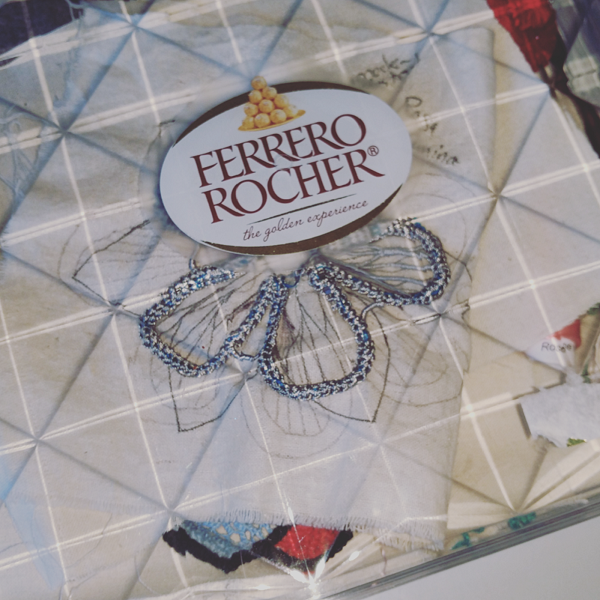
I use for example a fererro rocher square box once the chocolates are done, or an ice cream container once it;s empty. First of all you recycle, so nature check and second you save money!
These boxes are great and if they get damaged you do not feel sorry if you discard them, you did not spend a dine on it.
The other think is just in case you have little kids like me or pets, you can keep your project save and dust free. It’s easy to pick up and move it away or store it.
But now let me show you all the projects started!
Mondrian inspired brooch! Loved to make the brooch and it will be a one of as far as I can think atm. If the interest is there, I might start a line. Let me know what you think about that!
It has a pin at the back and is fun to wear on something white or black!
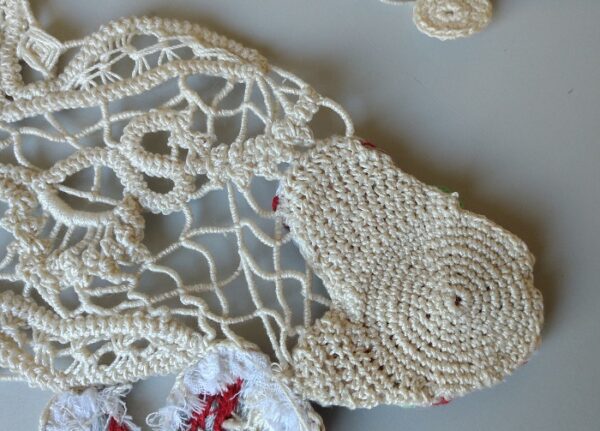
Now the other project if you remember, was the Rosebud modern Romanian Point Lace doily.
I finished the embroidery and once it was all in place, it was time to work on the back side of the doily.
The back part is simple crochet. There is no real pattern that I followed. You need to make sure that it;s neat and covers the back in an organic motion. See image.
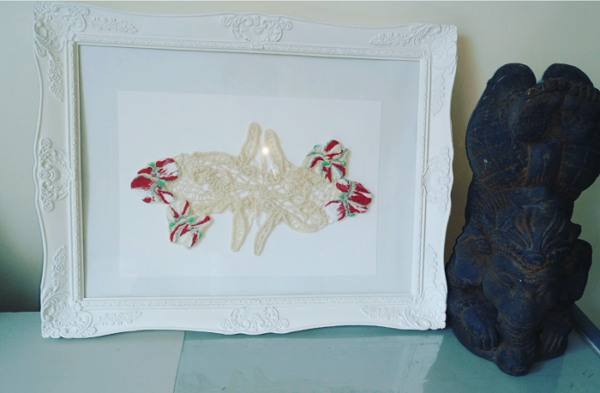
You can use the doily as a wall art, which I do mostly. So I framed it in a vintage style frame, like the one below or use it on a furniture piece or a tray, etc…. I am sure you find a fantastic use for it.
It;s very trendy atm to use crochet doilies as a dream catcher so why not with this type of doily?!
Sew around the edges of the rosebud embroidery designs and connect the crochet back part with the embroidery. Now you can steam clean or iron press the ready doily.
If you feel that you worked the doily a lot and the threads feels, or looks dirty, give it a quick hand wash. Make sure that you do not squish it very harsh and dry it flat on a towel. Once it;s air dry ( no dryer) you can start using it. If you feel the need to block it by all means do it. I have notes that with most RPL pieces it;s actually not necessary. BUT, said so, if you like it extra flat and stiff, of course you can block it. Here is how it looks in the frame.
What I wanted to achieve it that the embroidery is at the edge of the doily. Normally in traditional RPL, the embroidery is only in the centre. Recently, it started to become trendy and more embroidery is added, in other places, like ending and between the cords.
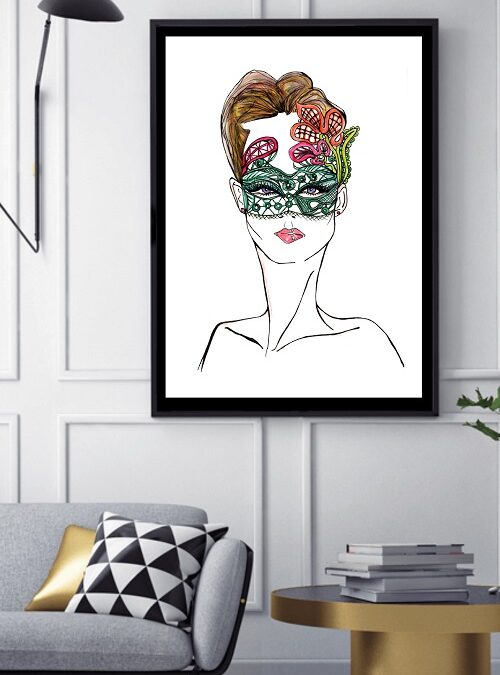
The lace mask you have seen in the older blog post, but if you need a reminder, click HERE. It turned out gorgeous the mask and the little one was very pleased with it. I created a listing for it and it’s now available on ETSY as custom order.
The Rosa Canina floral design in traditional ecru and white from the last blog , click HERE, was just the beginning I think … I am very inspired to take this project a bit further and create something different with it. and so I experimented with different threads and styles. I used silk rayon and rayon silk threads- different sizes and colours. All is wip atm. The pink thread is pure silk and is from the UK DeVere Yarns. If you want to check them out, click HERE.
Is there a project you explore more? If yes, let me know!
Working with different types of materials, is sometimes a challenge and very interesting.
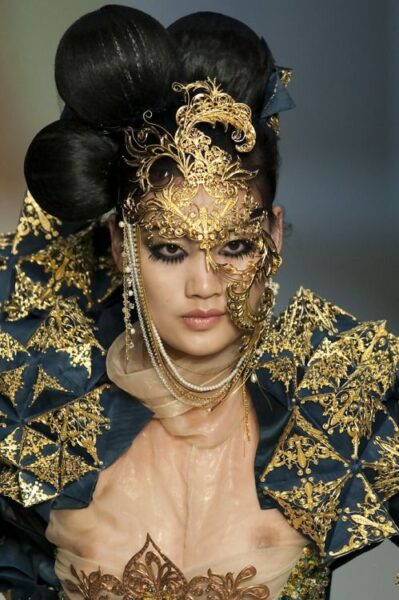
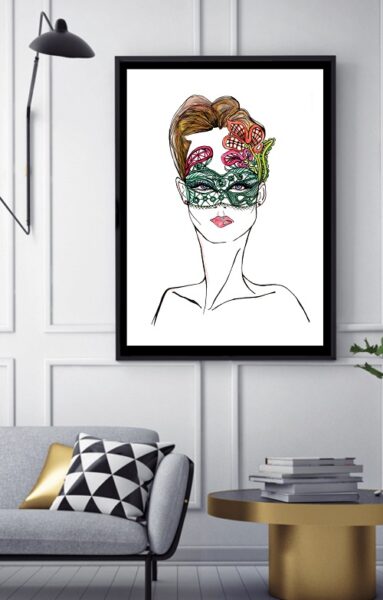
I actually like masks, I have to say I can’t wear them coz I am wearing glasses and absolutely failing on putting contacts on. With this said, I can show you how I made a mask of course in RPL for the first time! Now the image above is not your usual mask, but I think you know by now, that I never pick your usual designs! Image -Guo Pei Haute Couture Gilded Mask.
The Idea…..
I was asking in a really gorgeous FB group what else I could create in RPL , next to my jewellery and pattern. Now one lady suggested, that I create lace masks, and so I did a lot of research and gave it a long thought. If you would like to check out her amazing Etsy store, check it out HERE. She does gorgeous items! Thank you Karen, you made me think about mask lace idea! I had many questions, that I needed to answer, before even embarking such project. A large project because, masks are different. You put it around your face, so it has to mould easy and stay ok….
So I checked Pinterest. Here you can visit our our boards!
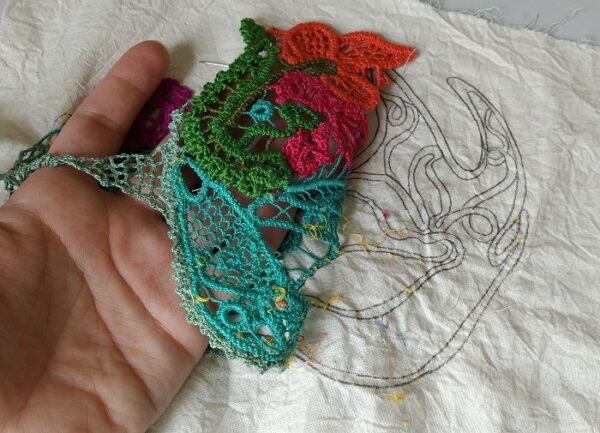
And the cords is on!
Above, you can see the beginning of the mask idea…. Raw, easy and still a virgin….. LOL! I had no particular fillings in mind, no ideas, where it will take me and if it would be larger or smaller. Quickly after the base idea was shaped in my mind, colours and netting were picked. I ended up adding tulips to it.
It was important to me to combine, greens and vibrant colours to make it all come together. And like I said, I wanted to say away from black and classic red or white. Anyways, this is where it went…
A mask is an ancient form of a facial disguise, it was used to frighten enemies and contain identity. In modern day the mask is generally known to be a symbol of the concealment of the ego behind an artificial mask. In ancient Greece the mask was very common, and used for actors on stage. But do you know, where that mask comes from? Actually mask exist from 7000BC and were used in theatre ( Greece) but they became very popular in ancient China and in the 13th century they very introduced in Italy, specific in Venice…. The rest is history and the mask dominated and fascinated Europe since then… The Carnival was born and the Masquerade…. was a new idea… But back to this project…
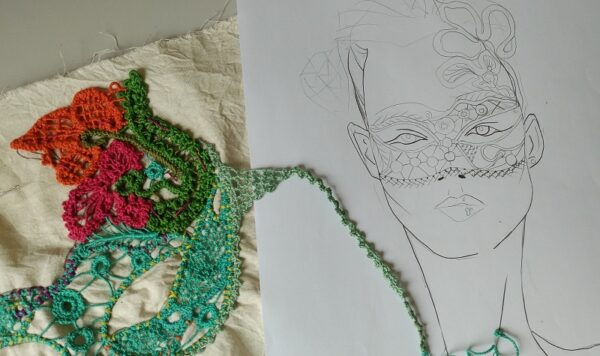
The Sketch….
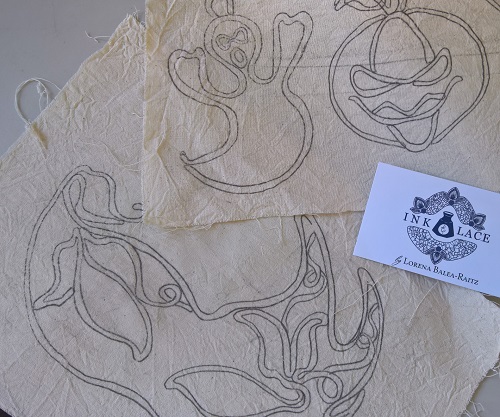
Before starting the lace on calico and having enough cord, I always sketch and draw the idea of the mask. This sketch was the start and birth of the mask. Even though I sketch the mask with an adult woman in mind, I wanted the mask to be wearable for my little girl in mind.. I wanted to make it fun and here came the idea of adding flowers and so to add colour – in this case vibrant emerald. She is born in May so emerald is her gemstone. It was falling into place just fine.
I also introduce into the mask, the traditional crochet rings, as seen above. I loved the idea of recreating a web like design….. I will elaborate the sketch into a watercolour print as soon as possible….
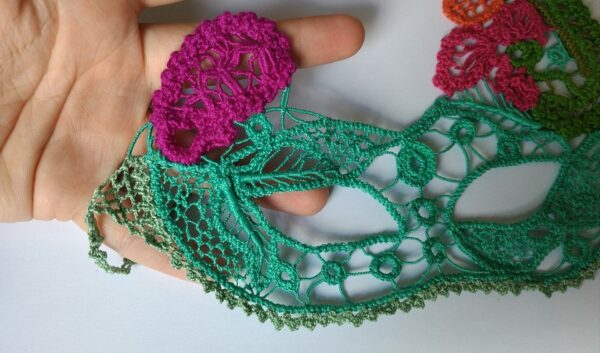
The designs in the mask are a mix of netting and fillings. I am also using different type of cords like you see in the image above. A simple cord in the dark / emerald green and a fan cord in the lighter green.
The Illustration…
So, now let me show you how it looks on her…. coz voila it;s ready! And If you are interested in having a mask done in this style or similar, get in touch! Also if you like the illustrations, you can check out the Etsy Store HERE. I am very exited about this piece, not only because it;s the first time I made, it, but also because it made my little one so happy and she felt exited about wearing something so different!
As far as I remember, Romanian Point Lace, was and will be always about organic shapes, about floral compositions and natural traditional forms.
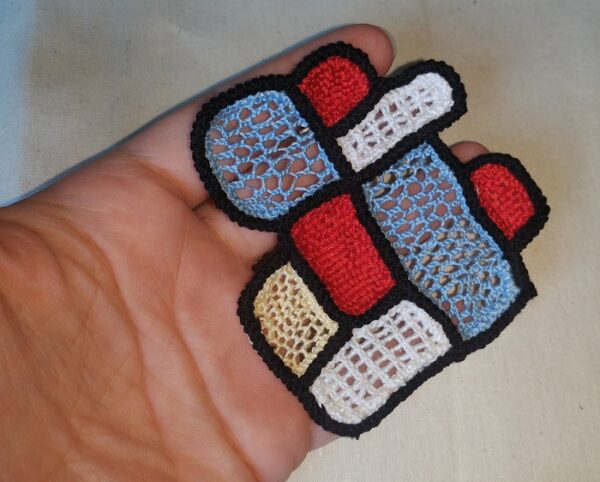
I was inspired a while ago, to create something in Romanian Point Lace that actually was art related. Yes, but not to do lace in landscape, style or portrait. I wanted to be radical and take RPL to a different level in lace making- minimalist and simple. So it had to be Piet Mondrian. The dutch painter is one of my favourite artists.
One of my favourite quotes form Mondrian, is the one below, and this was in my mind, while working on a new RPL design.
“To approach the spiritual in art, one will make as little use as possible of reality, because reality is opposed to the spiritual.”
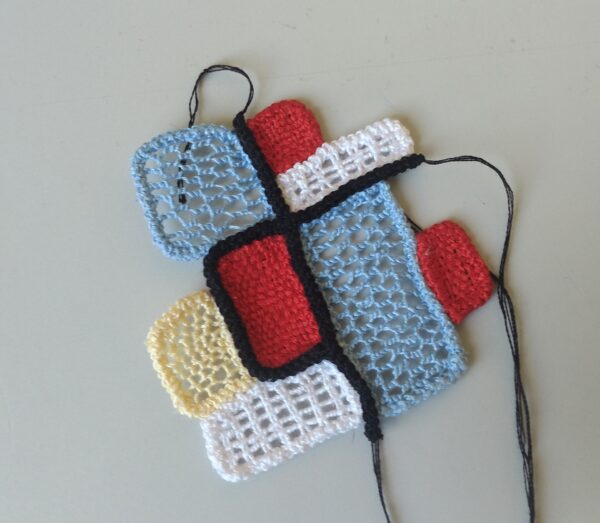
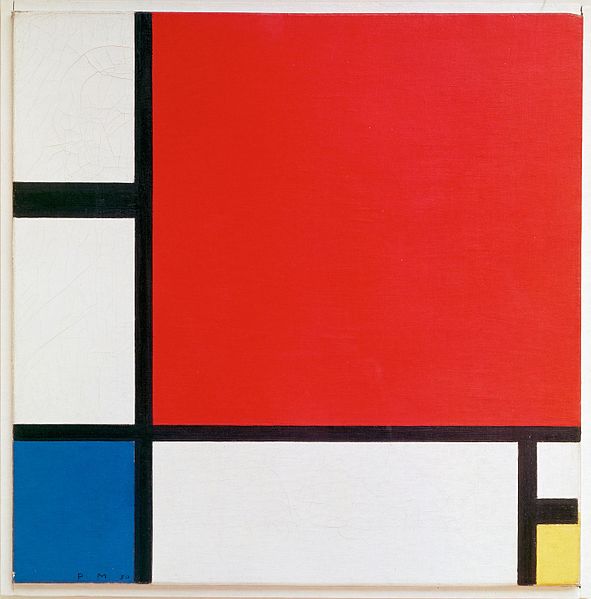
I had in mind to start with similar colours but to make light blue a larger focus and to give red a painting look like vibe, by creating a cover weaving design. I picked RED, LIGHT BLUE, WHITE of course and a touch of LIGHT YELLOW. Of course the black lines at the end.
The famous Composition II from 1930 Red, Blue and Yellow was always in the back of my mind. If you can;t picture what I mean check out the painting below. Oil on canvas and his best known work. One of Mondrian’s best known works, a product of his De Stijl period.
And now let me show you how I approached his style in my RPL. The idea is to start with clean lines and fill them up with netting designs. It would have been overwhelming to create gorgeous Romanian Point Lace style floral fillings and integrate designs, that would take way from the inspiration.
The idea is to give RPL a freshness a new style so new generations view this type of lace with new ideas and get the idea to create something incredible! C’mon I dare you, paint with the needle!
He gave the art world such a fresh
view on art, on shapes and opened the minds of future artists and painters.
I am trying to achieve it with future lace makers, crochet artist and textile designers.
This is the way I was approached by my professors at the fine arts university…
I love the soft colour combo and the deep red that breaks it a bit and makes it stand out.
Also considering that it will be with black simple cord lined out, it gets me a bit exited… It’s always cleaned out once black is added to an art piece, and I want to mimic this effect that is so basic and giving in art into this lace piece. Last night I was thinking about, what this could be and I believe it makes a great accessory as well as a fantastic wall piece framed. I will see how it works out best.
As far as accessory, it would make a fabulous brooch. Not tooooooooooooo large, and still with a statement , BOLD, CLEAR, MODERN and a CONVERSATION STARTER.
It;s great once a piece comes together…. and here I believe it does, by adding the black. I will line it up and update you on the finish piece in another post. Like you know I work on many projects at the same time, just because , well I can LOL!
Stay tuned to see all the updates, so make sure to sign up for the newsletter HERE! This way you will receive a 15%off! Happy Shopping!
Sign Up Now and you will receive 15% OFF your first order PLUS grab 4 FREEBIE including My morning routine Reiki principles, Palm Chakras Activation, Thread_Yarn Cheat Sheet and a print and art journal mood trackers.
Thank you for subscribing. Please use the discount code SIGNUP15 on checkout. An email is also on the way with your FREEBIES.

 As you can see, the cord has a wave pattern in it. and once achieving the right length, you can start with the crochet part of the design. It is easy to create a design by using the edges of the cord….
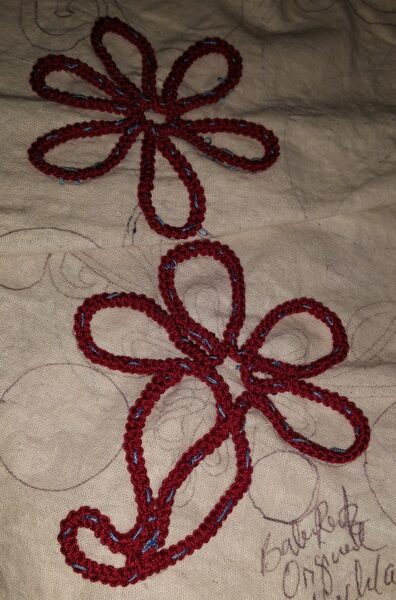 It;s always an interesting process, meditative to me and relaxing to sew the cord to the calico and thinking about the fillings. Some of the fillings you can see in the image below. Remember, do not so more thn 3 designs in one element!
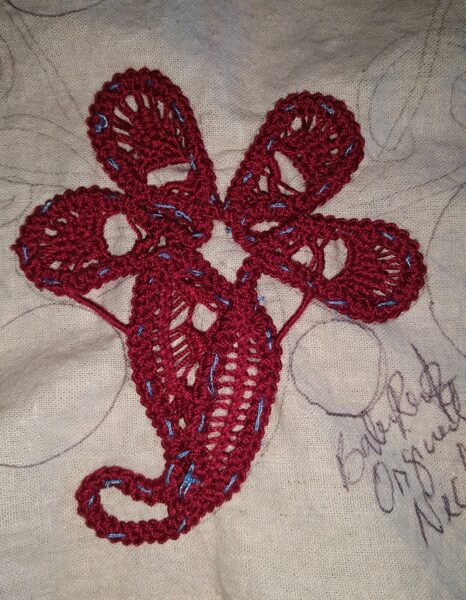 crochet clothing. So stay tuned to more updates!

 What I wanted to achieve it that the embroidery is at the edge of the doily. Normally in traditional RPL, the embroidery is only in the centre. Recently, it started to become trendy and more embroidery is added, in other places, like ending and between the cords.
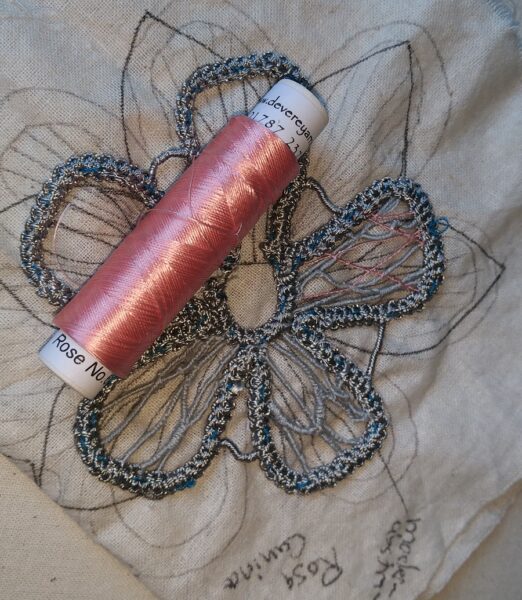


 The idea is to give RPL a freshness a new style so new generations view this type of lace with new ideas and get the idea to create something incredible! C’mon I dare you, paint with the needle!